Implementing a Full CI/CD DevSecOps Pipeline for Seamless Application Deployment

In this Project We will deploy a Python Flask app with high availability and auto-healing.
Tools Used.
Terraform ( To provision EC2 instance)
EC2 ( to use it as jenkins , sonar server )
Jenkins ( to build pipeline )
SonarQube ( to perform code quality analysis )
Trivy ( to do FS and dokcer image scan )
Docker ( to build the docker image from docker file )
Github ( Code is present in repo )
DockerHub ( To push or docker image )
Kubernetes ( to deploy our app )
Task 1: PROVISION EC2 INSTANCE USING TERRAFORM.
Step 1) create a main.tf file .
terraform {
required_providers {
aws = {
source = "hashicorp/aws"
version = "~> 5.0"
}
}
}
provider "aws" {
region = "ap-south-1" # Change the region as needed
}

variable "ami_id" {
description = "AMI ID for the instances"
type = string
default = "ami-0f58b397bc5c1f2e8" # Change this to the appropriate AMI ID for your region
}

variable "instance_type" {
description = "Instance type"
type = string
default = "t2.medium"
}
resource "aws_instance" "jenkins" {
ami = var.ami_id
instance_type = var.instance_type
key_name = "Docker test"
tags = {
Name = "Jenkins-Server"
}

root_block_device {
volume_size = 30
}
}
Now apply the configuration to create the resources.
terrafrom init
terrafrom plan
terraform apply --auto-approve

Task 2: Install and configure tools on Ec2 instance.
- Docker
sudo apt-get update
sudo apt install docker-compose
sudo apt-get install docker.io -y
sudo usermod -aG docker $USER   #my username was ubuntu
sudo chmod 777 /var/run/docker.sock
- Jenkins
sudo apt install openjdk-17-jdk

sudo wget -O /usr/share/keyrings/jenkins-keyring.asc https://pkg.jenkins.io/debian-stable/jenkins.io-2023.key
echo "deb [signed-by=/usr/share/keyrings/jenkins-keyring.asc]" \
  https://pkg.jenkins.io/debian-stable binary/ | sudo tee \
  /etc/apt/sources.list.d/jenkins.list > /dev/null
sudo apt-get update
sudo apt-get install jenkins
- Trivy
sudo apt-get install wget apt-transport-https gnupg lsb-release -y
wget -qO - https://aquasecurity.github.io/trivy-repo/deb/public.key | gpg --dearmor | sudo tee /usr/share/keyrings/trivy.gpg > /dev/null
echo "deb [signed-by=/usr/share/keyrings/trivy.gpg] https://aquasecurity.github.io/trivy-repo/deb $(lsb_release -sc) main" | sudo tee -a /etc/apt/sources.list.d/trivy.list
sudo apt-get update
sudo apt-get install trivy -y
- Run sonarqube container.
docker run -itd --name sonarqube -p 9000:9000 sonarqube:lts-community


Task 3 : Configure Jenkins.
Step 1 ) Install the below mentioned plugins in Jenkins and configure them.
Sonar Quality Gates Plugin , SonarQube Scanner for Jenkins
Docker-build-step , Docker , Docker Pipeline , Docker Commons , Docker API
Kubernetes CLI , Kubernetes , Kubernetes Client API , Kubernetes Credentials


Step 2) Configure the installed tools.
Generating token to connect SonarQube and Jenkins.

Credential Configuration ( manage jenkins -> Credentials )

Configure Webhook for Connection.
Jenkins to Sonar.

Sonar to Jenkins.

Plugins Configuration.
Docker

SonarQube.

Task 4 : Building Pipeline
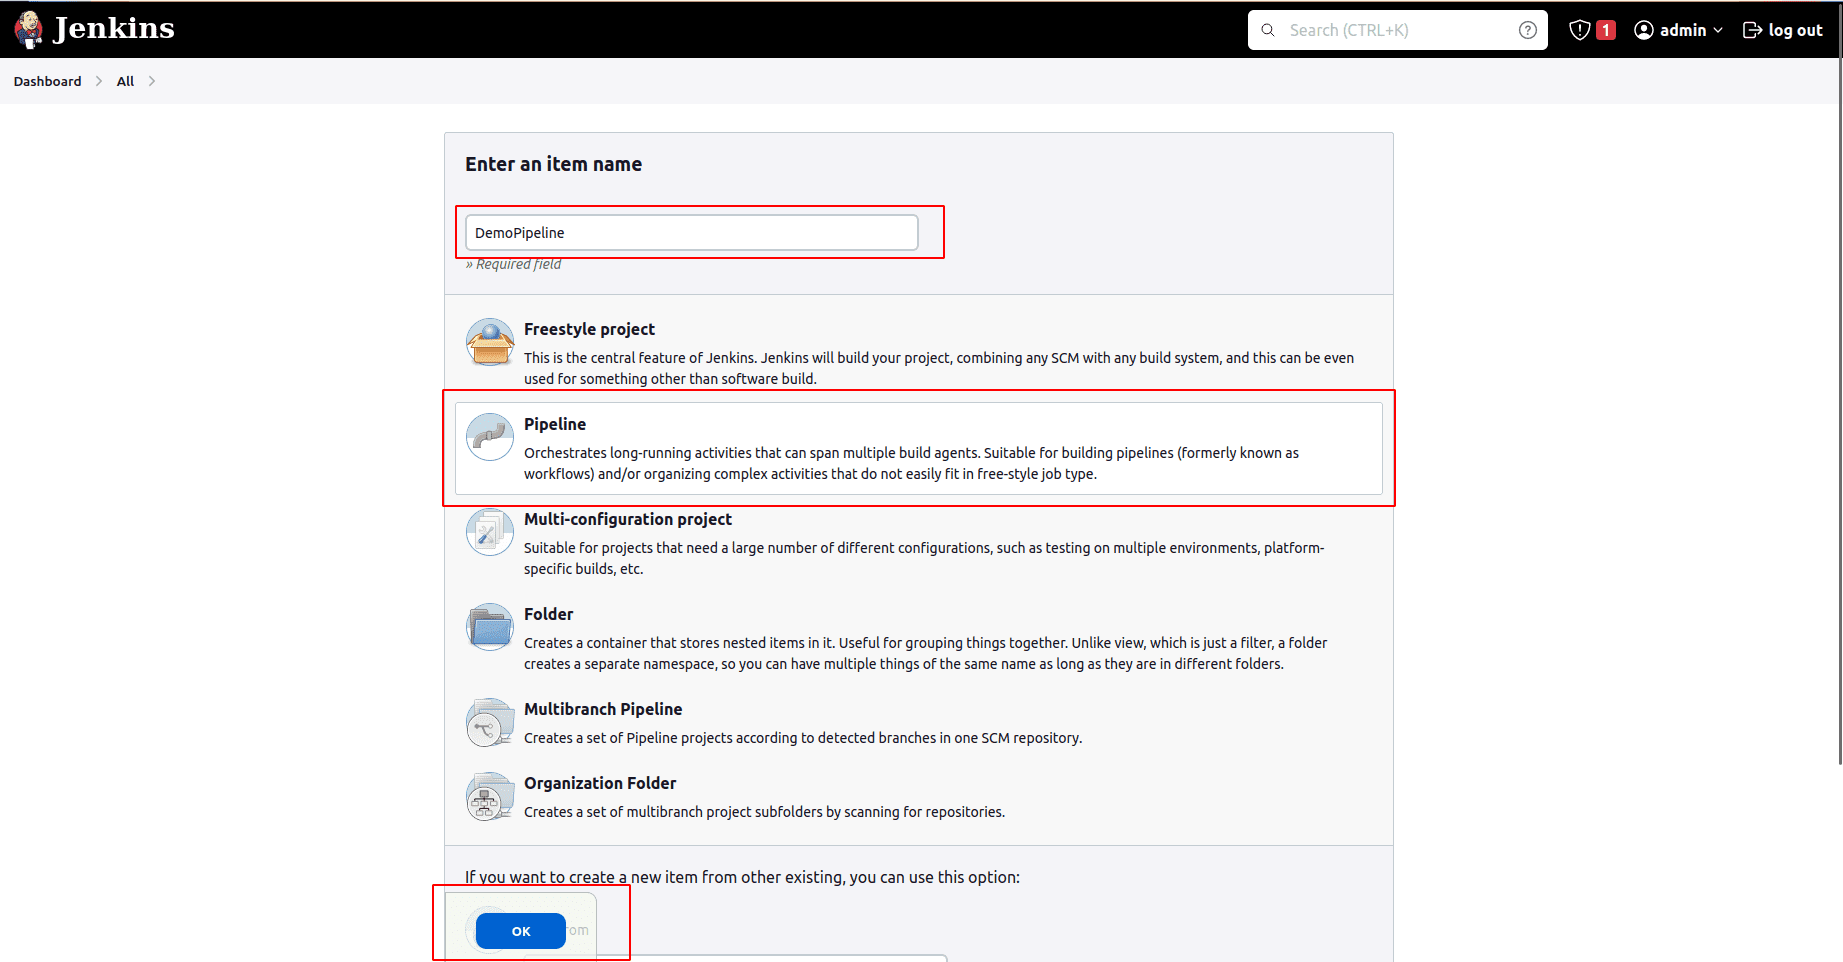
Pipeline: Deploying our App on docker Containers.
pipeline {
    agent any
    environment{
        SONAR_HOME= tool "sonar"
    }
    stages {
        stage('Code cloning') {
            steps {
                git branch: 'main', url: 'https://github.com/Abhishek-Verma99/Dockerizing-a-Flask-App.git'
            }
        }
        stage('Sonar Analysis') {
            steps {
                withSonarQubeEnv("sonar"){
                 sh "$SONAR_HOME/bin/sonar-scanner -Dsonar.projectName=wanderlust -Dsonar.projectKey=wanderlust"
                }
            }
        }
        stage('Trivy FS Scan') {
            steps {
                sh "trivy fs --format table -o trivy-fs-report.html ."
            }
        }
        stage('Build and push ') {
            steps {
                script{
                    withDockerRegistry(credentialsId: 'docker', toolName: 'docker') {
                        sh "docker build -t abhishekverma14/simple-flask-app:latest ."
                        sh "docker push abhishekverma14/simple-flask-app:latest "
                        }
                }
            }
        }
        stage("TRIVY Image Scan"){
            steps{
                sh "trivy image abhishekverma14/simple-flask-app:latest > trivyimage.txt"
            }
        }
         stage('Deploy') {
            steps {
                sh "docker build -t simple-flask-app:latest ."
                sh "docker-compose up -d"
            }
        }
    }}
This pipeline will deploy our container through a docker compose file which is present in the git repo. However we can deploy our app on k8s cluster also for high-availability and auto-healing. Below are the steps.
Task 5 : Deploying our APP on EKS Cluster.
Step 1) Setting up EKS Cluster on AWS.
To setup EKS cluster on AWS , we need to install AWS CLI, ekstcl and kubectl on our machine.
- eksctl
sudo apt update && sudo apt upgrade -y

curl --silent --location "https://github.com/weaveworks/eksctl/releases/latest/download/eksctl_$(uname -s)_amd64.tar.gz" | tar xz -C /tmp
sudo mv /tmp/eksctl /usr/local/bin
eksctl version
- aws-cli
curl "https://awscli.amazonaws.com/awscli-exe-linux-x86_64.zip" -o "awscliv2.zip"
unzip awscliv2.zip
sudo ./aws/install
aws --version

aws configure  # generate accesskey and secretkey in your AWS account to configure aws-cli
- kubectl
curl -LO "https://storage.googleapis.com/kubernetes-release/release/$(curl -s https://storage.googleapis.com/kubernetes-release/release/stable.txt)/bin/linux/amd64/kubectl"
chmod +x ./kubectl
sudo mv ./kubectl /usr/local/bin/kubectl

kubectl version --client
Now all the necessary tools are downloaded, lets use all three of these to create an EKS cluster.
eksctl create cluster --name my-cluster1 --region ap-south-1 --node-type t2.small --nodes 2
#- with this command an eks cluster with 2 worker nodes (EC2 instances of type t2.small ) will be created.


Task 6 : Connecting EKS Cluster with Jenkins and deploying the app on Cluster.
Now we have a eks cluster but we need to connect it to jenkins , we will do that by creating a service account and role then bind that role to service account and then we will generate a token fo the service account, that token will be used by jenkins to connect to our eks cluster.
kubectl create ns webapps
#svacc.yaml

apiVersion: v1
kind: ServiceAccount
metadata:
  name: jenkins
  namespace: webapps
#role.yaml

apiVersion: rbac.authorization.k8s.io/v1
kind: Role
metadata:
  name: app-role
  namespace: webapps
rules:
  - apiGroups:
        - ""
        - apps
        - autoscaling
        - batch
        - extensions
        - policy
        - rbac.authorization.k8s.io
    resources:
      - pods
      - secrets
      - componentstatuses
      - configmaps
      - daemonsets
      - deployments
      - events
      - endpoints
      - horizontalpodautoscalers
      - ingress
      - jobs
      - limitranges
      - namespaces
      - nodes
      - pods
      - persistentvolumes
      - persistentvolumeclaims
      - resourcequotas
      - replicasets
      - replicationcontro
      - services
    verbs: ["get", "list", "watch", "create", "update", "patch", "delete"]
#rolebinding.yaml

apiVersion: rbac.authorization.k8s.io/v1
kind: RoleBinding
metadata:
  name: app-rolebinding
  namespace: webapps
roleRef:
  apiGroup: rbac.authorization.k8s.io
  kind: Role
  name: app-role
subjects:
- namespace: webapps
  kind: ServiceAccount
  name: jenkins
kubectl apply -f svacc.yaml
kubectl apply -f role.yaml
kubectl apply -f rolebinding.yaml
Now our serviceaccount, role is created and we have done the rolebinding also, now we need to generate the credentials for this service account.
#secret.yaml

apiVersion: v1
kind: Secret
type: kubernetes.io/service-account-token
metadata:
  name: mysecretname
  annotations:
    kubernetes.io/service-account.name: jenkins              #your service-account name.
kubectl apply -f secret.yaml
To see the details for that Secret, run:
kubectl describe secret mysecretname -n webapps
You will get a secret and this needs to be added in jenkins under Dashboard -> manage jenkins -> credentials.

Task 7 : Final Pipeline.
pipeline {
    agent any
    environment{
        SONAR_HOME= tool "sonar"
    }
    stages {
        stage('Code cloning') {
            steps {
                git branch: 'main', url: 'https://github.com/Abhishek-Verma99/Dockerizing-a-Flask-App.git'
            }
        }
        stage('Sonar Analysis') {
            steps {
                withSonarQubeEnv("sonar"){
                 sh "$SONAR_HOME/bin/sonar-scanner -Dsonar.projectName=wanderlust -Dsonar.projectKey=wanderlust"
                }
            }
        }
        stage('Trivy FS Scan') {
            steps {
                sh "trivy fs --format table -o trivy-fs-report.html ."
            }
        }
        stage('Build and push ') {
            steps {
                script{
                    withDockerRegistry(credentialsId: 'docker', toolName: 'docker') {
                        sh "docker build -t abhishekverma14/simple-flask-app:latest ."
                        sh "docker push abhishekverma14/simple-flask-app:latest "
                        }
                }
            }
        }
        stage("TRIVY Image Scan"){
            steps{
                sh "trivy image abhishekverma14/simple-flask-app:latest > trivyimage.txt"
            }
        }
        stage("deploy to k8s"){
            steps{
                    script{
                            dir('Kubernetes') {
                            withKubeConfig(caCertificate: '', clusterName: 'my-ekscluster', contextName: '', credentialsId: 'k8-token', namespace: 'webapps', restrictKubeConfigAccess: false, serverUrl: 'https://346E307D732BE358E635397C04AD9567.gr7.ap-south-1.eks.amazonaws.com')
                            {
                                sh "kubectl apply -f deployment.yaml -n webapps"
                                sh "kubectl apply -f service.yaml -n webapps"
                            }
                    }
                }
            }
        }
    }}

Output*

Thanks all. Good luck out there!
Follow for more such amazing content :)
Happy Learning 😊


